Generating an invoice
Generating an Invoice Against a Billing Schedule
The billing cycle range of a Billing Contract (and its related billing schedules) is defined by the Billing Contract Start Date.
- Example: If the start date is January 1, 2020, and the billing frequency is monthly, the billing cycle runs 1st–31st.
- The invoice for this cycle will generate on the 2nd of the following month.
On the invoice entity you will be able to see the billing schedule Dates that the invoice is generated for.
For more details, see:
How Billing Schedules Work
- When the system runs automatic invoice generation, it creates billing schedules based on the Work 365 configuration.
- This process is the same for manual invoice generation.
- Once an invoice is generated for a billing schedule:
- The billing schedule becomes Inactive with status reason Invoiced.
- To view completed billing schedules:
Work 365 → Billing and Invoicing → Billing Schedules → Change view to Inactive Billing Schedules.
The generated invoice is linked in the Resulting Invoice field.
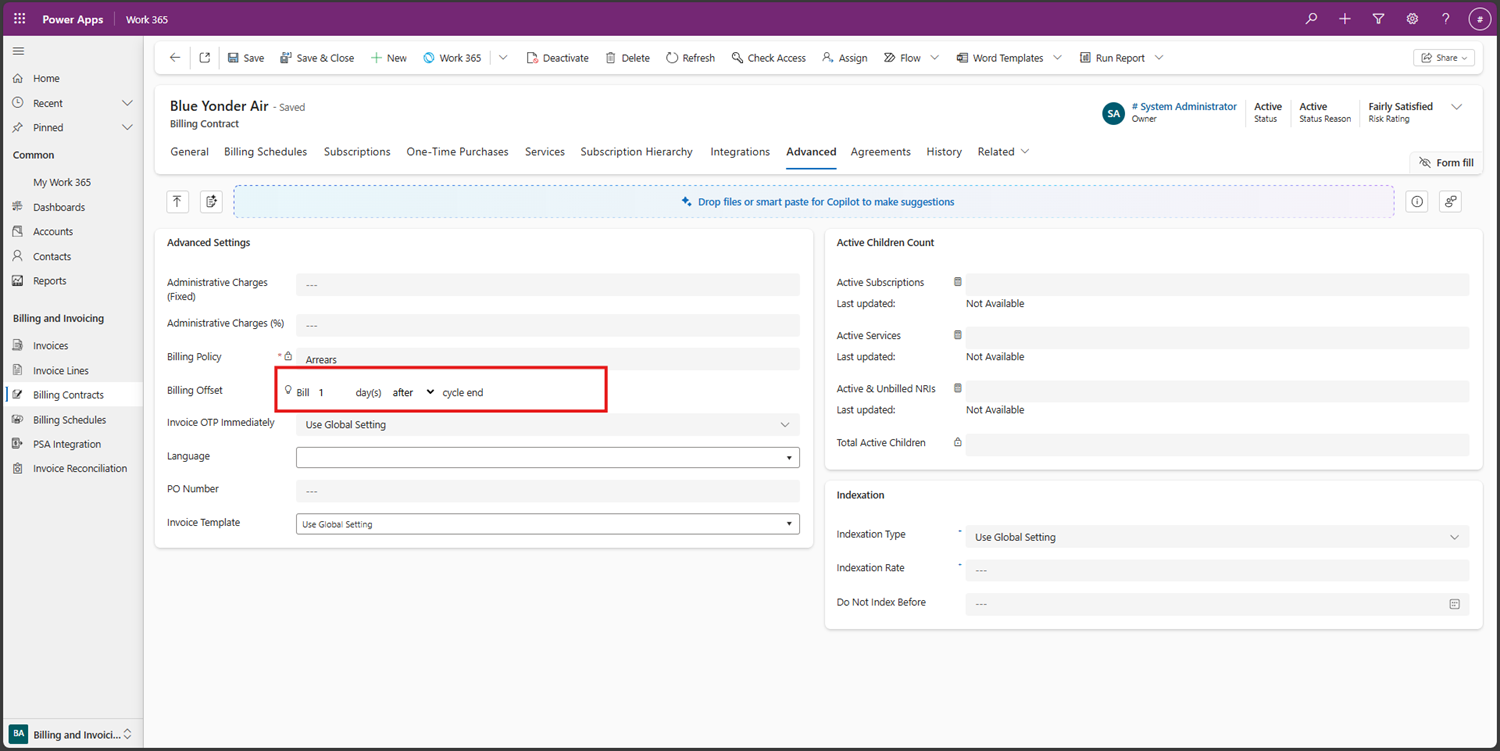
How Billing Offset Works
- Billing Offset allows you to have full control of when an invoice is billed to the customer. This setting is found in the Advanced tab in a billing contract and allows you to set before or after the cycle ends.
✅ Manually Generating an Invoice for a Future Billing Cycle
- You can generate an invoice before the billing cycle arrives (e.g., 1–2 months early).
- The invoice will align with the correct billing schedule.
- When the actual billing cycle arrives, the system will not generate a duplicate invoice.
Invoicing Scenarios
Scenario 1:
- System automatically generates an invoice for a billing contract.
- Associates the invoice with an existing billing schedule.
- Billing schedule becomes Inactive.
Scenario 2:
- Manually generating an invoice for a billing cycle where an invoice already exists.
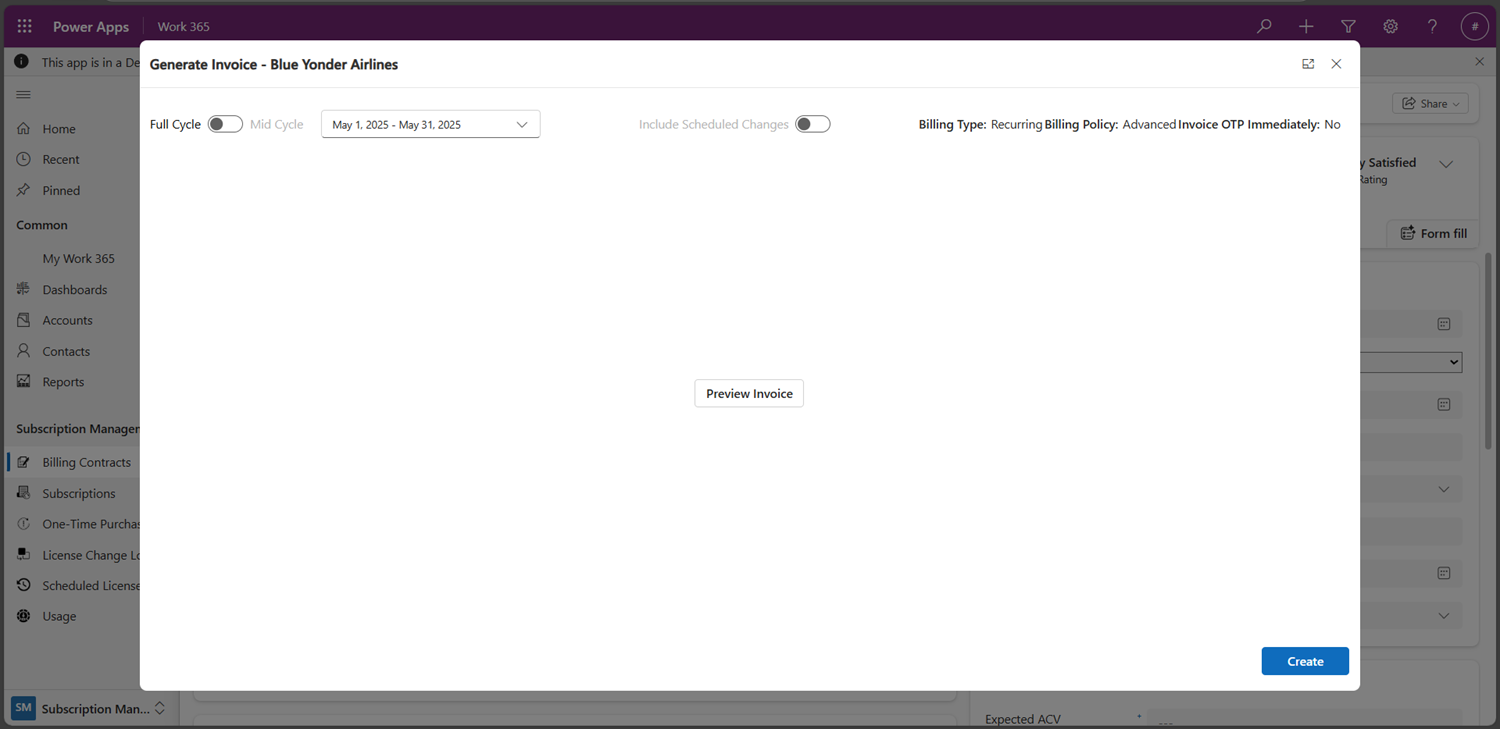
Steps to Generate an Invoice
- Go to Work 365 → Billing and Invoicing → Generate Invoice on the customer’s billing contract.
- Select the billing cycle range.
- If an invoice already exists for that cycle, a message will appear.
- Check Replace the existing invoice to create a new one.
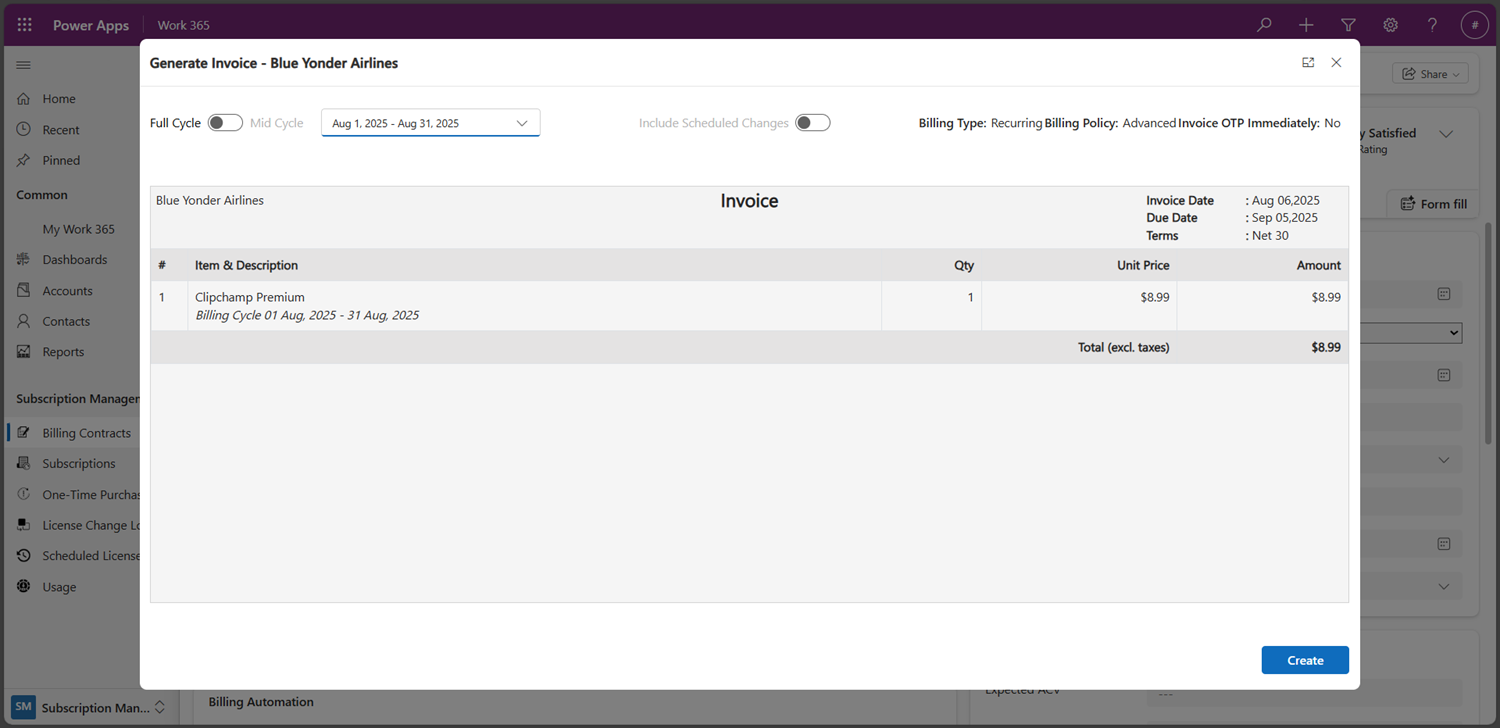
- Review the preview of items to be billed (can be toggled off).
- For future billing cycles, a warning message will appear.
- Click Proceed to generate the invoice.
- After generation, the notification will provide a link to the invoice.
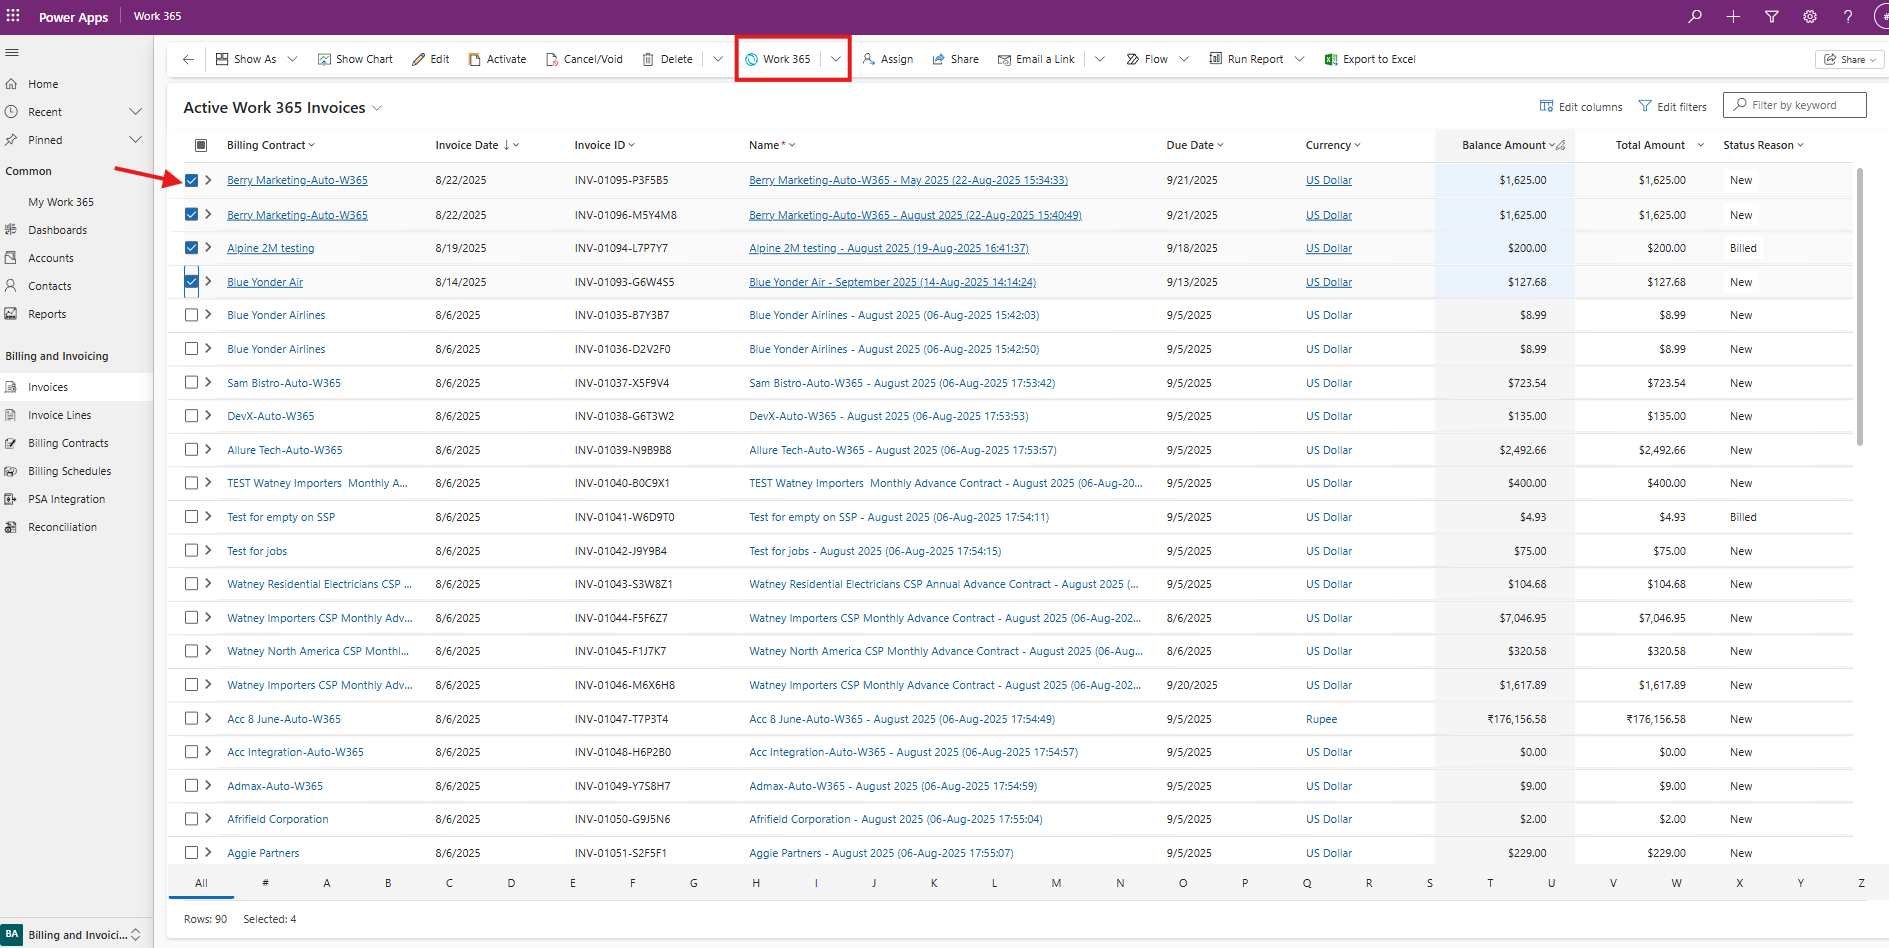
✅ Generate Invoices in Bulk
- Select the billing contracts you want to bill → Work 365 dropdown → Generate Invoice.
Important Notes
- Generating invoices for more than 10 billing contracts at once may cause delays or timeouts.
- If contracts have many subscriptions or high Azure usage, process fewer than 10 at a time.
- Bulk generation is manual, but you can trigger automatic post-invoicing tasks (sync, send, charge, etc.).
- If the selected billing cycle was already invoiced:
- A message will appear.
- You can change the billing cycle or replace the existing invoice.
Updated 7 months ago
Did this page help you?